How to Find Kokanee on a Fish Finder
It’s incredibly frustrating, isn’t it? You head out to your favorite Idaho lake, full of anticipation, only to spend hours blindly trolling or casting, wondering if you’re even in the right zip code for those delicious kokanee salmon. It feels like a treasure hunt without a map. This guide is designed to hand you that map, showing you exactly how to transform your fish finder into an indispensable tool for locating those elusive schools and significantly improving your kokanee catch rate.
Understanding Kokanee Behavior for Fish Finder Success
Before you even start fiddling with your fish finder settings, it’s crucial to understand a bit about kokanee salmon themselves. These landlocked sockeye are notoriously particular, and knowing their habits is the first step to making your sonar work for you. Think of your fish finder as a window into their underwater world; you need to know what you’re looking for!
Seasonal Movements and Depth Preferences
Kokanee are pelagic fish, meaning they typically live in the open water column, not usually near the bottom or structure like bass or catfish. Their depth preferences shift dramatically throughout the year, largely driven by water temperature, light penetration, and the availability of their primary food source: zooplankton.
In spring, as the ice just comes off or the water begins to warm up, kokanee often hang out closer to the surface. The entire water column might still be quite cool, and zooplankton can be more dispersed. This is a great time to be looking in the upper 20-40 feet, especially early in the morning or late in the afternoon when light levels are lower. You might find them in more scattered groups, actively feeding. As the season progresses and the surface warms, they’ll start to move a bit deeper, chasing that ideal cool water.
By summer, Idaho's lakes like Lake Coeur d'Alene, Payette Lake, and Anderson Ranch Reservoir undergo thermal stratification. This means distinct layers of warm water on top (epilimnion), cooler water in the middle (metalimnion or thermocline), and cold water on the bottom (hypolimnion). Kokanee absolutely love the thermocline. It’s their sweet spot – cool enough to be comfortable, but warm enough to support ample zooplankton. This zone typically ranges from 30 to 70 feet deep, but it can vary based on the specific lake and the summer’s heat. Your fish finder will often show this thermocline as a distinct band of fuzzy returns across the screen, sometimes with schools of fish hovering right on top, within, or just below it. Knowing how to read a fish finder for kokanee will be key here.
As fall approaches and the water surface cools, the thermocline starts to break down. This process, called "turnover," causes the entire water column to cool and mix. Kokanee will begin their spawning migrations. During this time, you'll find them moving into shallower areas, congregating near river mouths or specific rocky shoals where they intend to spawn. Their behavior becomes more aggressive as they prepare to reproduce, and they might be found in shallower waters than any other time of year.
In winter, especially under the ice, kokanee typically suspend in deeper water again, often in the lower half of the water column but still above the very bottom. They become less active, conserving energy in the cold. If you’re ice fishing, your flasher or fish finder will be critical for pinpointing these suspended schools.
Identifying Kokanee Schools vs. Other Fish
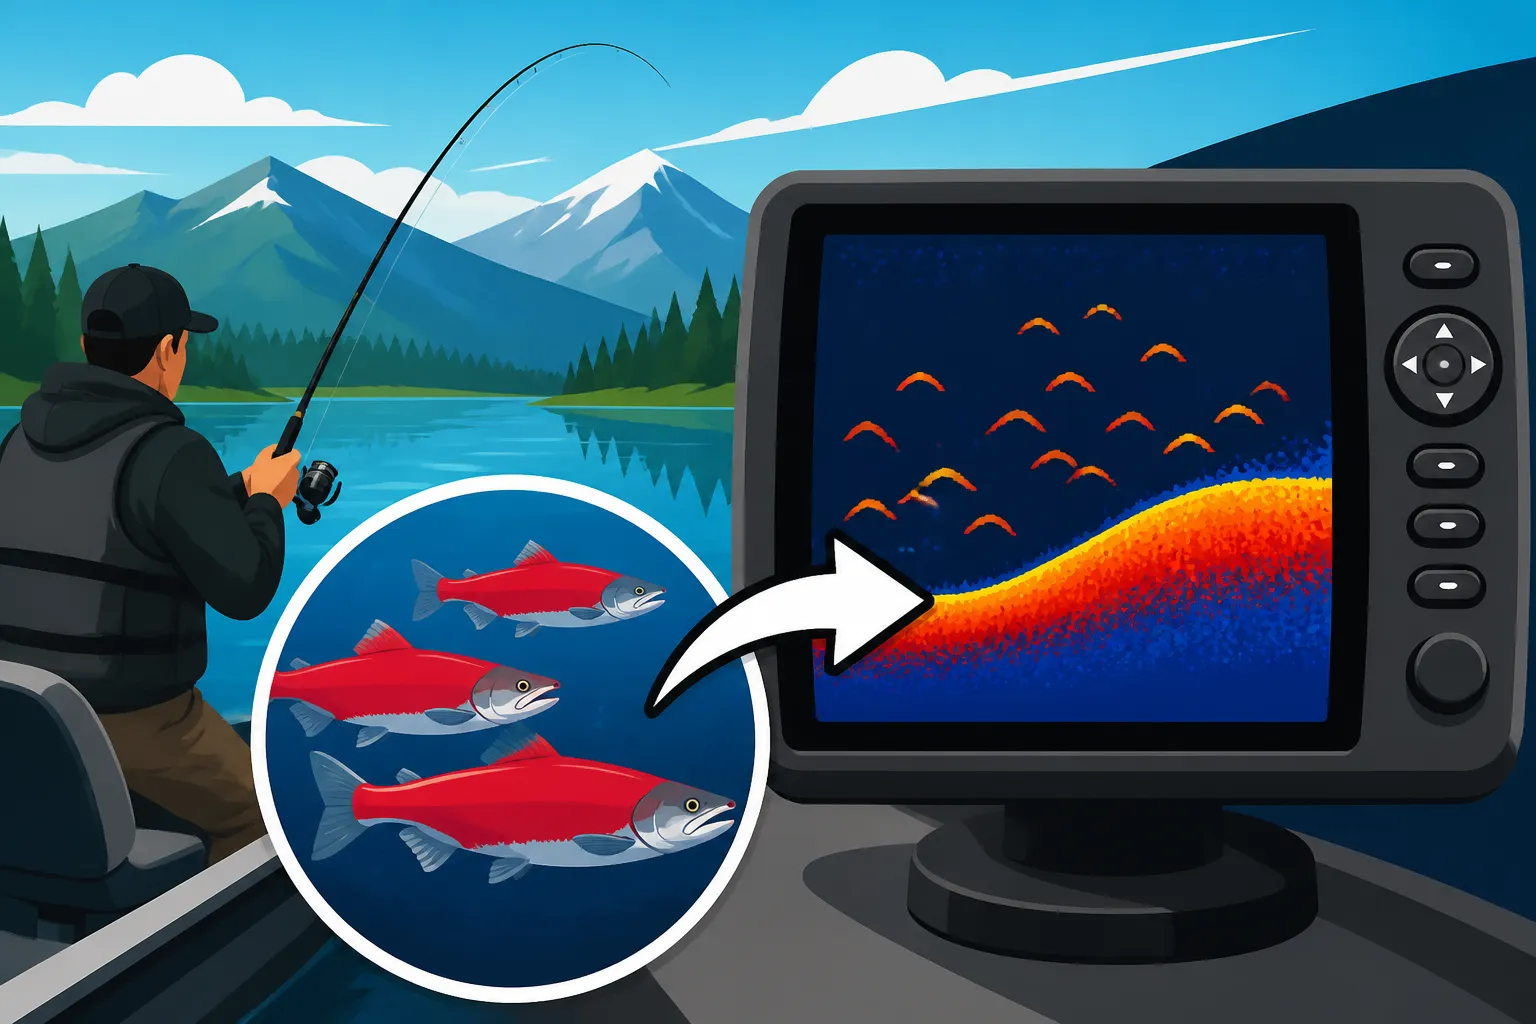
One of the biggest challenges on the water is figuring out if that blob on your screen is actually kokanee, or just a school of baitfish, or even bigger but less desirable species. Kokanee have a distinct signature on a fish finder.
They tend to form very tight, dense schools. Because they are primarily plankton eaters, they often pack together to feed efficiently. On a traditional 2D sonar, this can look like a solid "cloud" or "blob" on your screen. If you're lucky, and your boat passes directly over a school, you might see what anglers affectionately call a "Christmas tree" pattern – a wide, dense school that tapers off as your boat moves away from the center. This pattern indicates a large, tightly packed group.
How do you differentiate this from, say, a school of trout? Trout, especially rainbows or cutthroat, might appear as larger individual arches, or more loosely scattered groups. Bass often relate much more closely to structure like submerged trees, rock piles, or ledges, appearing as individual or small groups of arches near these features. Baitfish, like minnows or juvenile perch, will also form schools, but they are often smaller, less dense, and might appear as a "haze" or very fine granular returns, rather than solid, defined masses. The key is the density and shape of the school, often suspended in open water, which is a classic kokanee tell.
Essential Fish Finder Settings for Kokanee Anglers
Having a fancy fish finder is one thing; knowing how to dial it in for the specific task of finding kokanee is another. Many anglers just use default settings, but a few tweaks can make all the difference in clearly seeing those suspended schools.
Adjusting Sensitivity, Gain, and Power
This is where many anglers miss out. Your fish finder's sensitivity or gain setting directly controls how much detail your unit displays. For kokanee, which are relatively small fish and often in deep water, you generally want to run your sensitivity as high as possible without creating excessive clutter or noise on the screen.
Start by increasing your sensitivity. You’ll notice more returns, including perhaps the thermocline or even individual zooplankton if you’re really cranking it up. The goal is to see fish arches and schools clearly. If your screen becomes too "noisy" with speckles and false echoes, back it off slightly. This sweet spot allows you to pick up the subtle returns from smaller kokanee. Water clarity and depth play a huge role here; in very clear, shallow water, you might need less sensitivity, while in deep, slightly turbid water, you'll need more to penetrate the water column effectively. It's a constant dance with your environment.
Power (measured in watts RMS) relates to how strong the sonar pulse is. While most modern units manage this automatically, higher power generally means better depth penetration and the ability to "see" through more adverse conditions. For kokanee, you want a unit with decent power to reach those deeper thermoclines in larger lakes like Lake Pend Oreille or Lake Coeur d'Alene.
Transducer Placement and Frequency
The transducer is the "eye" of your fish finder, sending and receiving sonar waves. Its placement is paramount. A poorly placed transducer can lead to a messy screen, lost readings at speed, and ultimately, missed fish. Ensure it’s mounted correctly, free of obstructions, and not in turbulent water caused by the hull or prop. For trolling, especially, it needs a clean water flow to give you consistent readings.
Now, let's talk about frequency. Most traditional fish finders operate on dual frequencies, typically 200 kHz (high frequency) and 50 kHz (low frequency), or a combination in CHIRP units.
- 200 kHz (High Frequency): This frequency provides excellent detail and target separation in shallower water (up to about 200-300 feet, depending on power). It has a narrower cone angle, which means it shows you what’s directly beneath your boat with great precision. For kokanee, which are often schooling, this high detail can help differentiate individual fish within a school. If you’re targeting kokanee shallower, or want the crispest image, 200 kHz is your friend.
- 50 kHz (Low Frequency): This frequency offers better depth penetration, capable of reading hundreds or even thousands of feet deep. It has a wider cone angle, which gives you a broader picture of the underwater world but with less detail. For very deep kokanee in the largest Idaho reservoirs, the 50 kHz might show you schools that the 200 kHz misses, simply because it covers more water.
However, for most serious kokanee anglers, CHIRP (Compressed High-Intensity Radiated Pulse) sonar is the gold standard. Instead of sending a single frequency, CHIRP sends a continuous sweep of frequencies, from low to high, and then interprets the returns. This results in incredibly clear, high-resolution images, superior target separation (meaning you can distinguish individual fish in a tight school), and excellent depth penetration. A "high CHIRP" frequency is fantastic for kokanee, providing stunning detail of schools and even individual fish at common kokanee depths. Many anglers purchase their CHIRP-enabled fish finders or transducers from reputable online retailers like Amazon to get the best selection and deals.
Interpreting Your Fish Finder Screen for Kokanee Hotspots
So, you’ve got your settings dialed in, your transducer is humming, and now you’re seeing all sorts of lines and blobs on your screen. The next step is knowing what those squiggly lines mean and, more importantly, how to translate them into kokanee.
Recognizing Arches and Schools
The classic "fish arch" is what every angler hopes to see. On a 2D sonar, a fish arch forms when your boat passes over a fish, and the sonar cone pings it from various angles as it enters, passes through, and exits the cone. A longer, thicker arch usually indicates a larger fish or one that spent more time in the cone.
For kokanee, you might see individual arches if they are spread out, but more often, you’ll see dense concentrations. These concentrations will appear as larger, often elongated or oval-shaped blobs, especially if the school is compact. As mentioned earlier, the "Christmas tree" pattern is a definitive sign of a good kokanee school directly below you. It starts wide, gets narrow, and then widens again, indicating you've passed through the center of a dense group.
Don't confuse these solid kokanee schools with scattered baitfish. Baitfish schools tend to look fuzzier, less dense, and often have a more chaotic or "cloud-like" appearance without distinct individual returns. Kokanee schools, even when tightly packed, will often show more distinct, albeit overlapping, returns, especially with good CHIRP sonar. If you spot these patterns in the typical kokanee depths you've identified, it's time to get your gear down there! This is also where knowing your local Idaho Kokanee Bag Limits comes in handy, so you can manage your catch responsibly.
Utilizing Down Imaging and Side Imaging
Modern fish finders offer more than just traditional 2D sonar. Down Imaging (or DownVü/DownScan) provides a picture-like view of what's directly beneath your boat. It uses a very narrow, high-frequency beam to create incredibly detailed, almost photographic images. For kokanee, this means you can often see the school with much greater clarity, sometimes even making out individual fish if the school isn't too dense. It's excellent for confirming that the "blob" on your 2D sonar is indeed a tight school of fish. You'll see them as distinct white or colored specks, suspended at various depths.
Side Imaging (or SideVü/SideScan) is a game-changer for covering vast amounts of water quickly. It sends sonar beams out to the sides of your boat, scanning a wide swath of the lake bottom and water column. While it's often touted for finding structure and fish relating to it, it's also invaluable for kokanee.
Imagine you're trolling, and your 2D sonar isn't showing much. With side imaging, you can scan hundreds of feet to either side of your boat. If you see a dense school of fish off to your port or starboard, you can then make a turn and troll directly over them. This saves you immense time compared to just using 2D sonar, which only shows you what's directly below. For open-water species like kokanee, side imaging helps you locate those elusive schools much more efficiently, allowing you to intercept them. It provides a much broader search pattern, particularly useful when kokanee are spread out or in vast bodies of water. Learning How to Troll for Kokanee on Lake Coeur d'Alene becomes much more effective with these advanced imaging tools.
| Fish Finder Technology | Best Use for Kokanee | Advantages | Disadvantages |
|---|---|---|---|
| Traditional 2D Sonar (50/200 kHz) | General school detection, depth reading | Good for basic marking, reliable over deep water | Lower detail, less target separation than CHIRP |
| CHIRP Sonar (High/Med/Low) | Detailed school identification, target separation, depth | Excellent clarity, distinguishes individual fish in schools, great depth | Can be more expensive, requires compatible transducer |
| Down Imaging (DownScan/DownVü) | Confirming schools directly below, high-resolution vertical view | "Picture-like" detail, easy to interpret fish within a school | Only views directly beneath the boat, not ideal for wide search |
| Side Imaging (SideScan/SideVü) | Wide-area scanning, locating schools off to sides | Covers massive areas, helps intercept moving schools | Less detail directly beneath, requires practice to interpret |
Advanced Tips and Techniques for Kokanee Fish Finding
Finding the fish is a huge win, but converting those marks into hooked fish requires a few more steps. Your fish finder isn't just about showing you where fish are; it's a dynamic tool that interacts with your fishing technique.
Pairing Fish Finder Data with Trolling Speed and Depth
Once your fish finder lights up with kokanee schools, it's time to refine your presentation. The depth at which you mark fish is critical. If your fish finder shows schools consistently at 45 feet, you need to get your lures to 45 feet. This is where tools like downriggers, lead core line, or specialized weighted dodgers come into play. Many kokanee anglers have a selection of these available, often purchased from Amazon, ready to deploy. You can even see the cannonball of your downrigger or the weight of your lead core on some high-end fish finders, allowing you to precisely put your lure right in front of the fish.
Trolling speed also plays a massive role. Kokanee prefer a slow, consistent troll, typically between 0.8 to 1.8 miles per hour. If you're marking fish but not getting bites, experiment with slight speed changes. Your fish finder can help you monitor this precisely. Many units have GPS-enabled speedometers. A common tactic is to watch your fish finder screen; if you pass over a school, you might slightly slow down or make a subtle "S" turn to keep your lure in the strike zone longer. This slight variation can trigger a bite from reluctant fish. Remember, kokanee often track down their food from behind, so a lure that's just a little bit slower might be easier to intercept. Understanding these nuances can significantly boost your success during the Best Time of Year to Fish in Idaho for kokanee.
Mark Waypoints and Track Patterns
This is perhaps one of the most underutilized features of modern fish finders. When you find a productive school, or even better, when you hook up with a kokanee, mark a waypoint immediately! These digital breadcrumbs are invaluable. Over the course of a day, or even several trips, you'll start to build a map of kokanee hotspots.
Kokanee don't just stay in one place; they move, often following zooplankton blooms or subtle temperature shifts. By marking waypoints where you consistently find or catch fish, you can start to observe patterns. Are they holding on a specific underwater ridge? Are they always at the same depth over open water? Do they move shallower or deeper as the day progresses? Your fish finder's mapping capabilities, often integrated with GPS, allow you to record these locations and revisit them.
Furthermore, many fish finders allow you to record your tracks. This is essentially a digital trail of where your boat has been. If you're consistently catching fish along a specific trolling pass, you can save that track and run it again on future trips. This data collection turns random luck into repeatable success. This is especially useful on large, complex waters like Lake Coeur d'Alene, where the vastness can be overwhelming without a systematic approach. If you're considering a specialized permit for certain species, like the Idaho Salmon and Steelhead Permit, the same principle of marking productive areas applies.
Disclaimer
Please note that fishing regulations, seasons, and licensing requirements can change. Always consult the latest Idaho Fish and Game regulations or official resources before heading out on the water. This guide provides general information and best practices.